Saturday, April 4, 2015

diggin for carrots :)

It's a little late but I'm about to show you my favorite snack of the week. I LOVE this.
Sweet, simple cannoli dip. Ok so I love cannolis. And so I love this dip. It's just so good.
I wanted to make this to bring to Easter dinner. But I was greedy. I had to make it earlier in the week so it did not last. Whaaa. I could make more. To share. If I have time.


 So this is so easy, the pictures explain themselves! There's still time for this post to save you on what do bring to Easter dinner. Or just to have all for yourself.


To make the bunny booty cookies you need some Nilla Wafers. My favorite cookie for cannoli dip. Also, have some melted white chocolate and micromallows for the tails. Oh and toothpicks are always useful..for something, like moving those tiny tails.


Simply dip about 3/4 of the cookie in the melted chocolate and lay on your wax paper to dry.


Butttt..before they dry, put a few micromallows on the top for the bunny booty tail.


Dip....


Tail...


Set...Easy!. You could do this with any cookie you like with your dip. Now for the dip.


I know. Something IS wrong with this picture. Believe me, I wanted to get the market pantry "cool whip" but they were out of it. Would have been perfect... #ocd


So you are going to put the 15 ounce container of ricotta cheese in a bowl and whip it up with your amazing spatula, like this. I hope you have one like this.


Next add the 1/4 cup of powdered sugar and the 1/4 teaspoon of vanilla extract. Mix well.


Then let's drop in the whole tub of cool whip - 8 ounces.


Stir it all up very well. You might be like, something's missing. Like maybe cream cheese...nah. I don't like it that way. But if you do, and that's your recipe, of course do as you like!


Before we add the best part - the chocolate chips - add some green coloring. I am just using this. Perfect. I want it to look like his digging, like really digging a hole in the grass when I serve this.


Look how pretty! I love to color this. I once did it purple, for the party I had when I made my very first cakepops. I mean color doesn't really matter though for this. It will be yummy no matter what. But let's just be festive. K.


Here's the best part. The chocolate chips in this color make it look minty chocolate chippy. It is not. PS I add as many chocolate chips as I want, no real measurement.


Stir them in and then take a little spoon for yourself, to make sure it all tastes good of course. Cover with plastic wrap and chill in the fridge for at least 30 minutes. Get a good chill. Chilly.


Once chilled, get ready to serve. I AM SO EXCITED. It's like I am eating it again. HAAA.


Scoop it up in your little bowls...


Put lots more chocolate chips, if you want. This is a digging site.


Serve with your plate of bunny booty cookies and stick in the bunny booties. SO cute!


DAWWWW. Too cute.


But NOT too cute to eat. AAAH Yumm.


Try pretzels too. I love pretzels and also broken pieces of ice cream cones, Teddy Grahams or graham crackers... all kids of goodies go well with this dip.
Be sure to save some to share! 


Hope you kinda liked this week of spring break treats! It was funny thinking up some things to make while the kids are home using stuff we have.

Have a Happy Easter! 

<3

Friday, April 3, 2015

what's up doc :P

Ok. I know what you're thinking. It's already been thought. But these are Easter bunny snacks people! For your kids! So get it out of your head and just think of the yum ahead, ok. Oh kay.


Come on. They're cute. Innocent bunnies eating carrots. Can't a bunny just have a carrot?! And can't I just eat all these, please?!
I love marshmallows and chocolate and pretzels. Yes, pretzels. That's what the carrots are.


The first thing you want to do is make your carrots so they're  dry and ready. Here's some things you need. A Rice Krispies Treat??? Yes. A RKT. It's useful, see.


Instead of laying your pretzel sticks on the wax paper after dipping, and getting that flat side no one likes, use a Rice Krispies Treat to stand them up in. Take a cake pop stick and quick make some preholes to stick them in. Preholes. Is that a word? 


 Dip your pretzel sticks in your orange candy melts as far as your fingers will allow without covering them. Shake off the excess to get a smooth carrot.


Flip upside down - dry side down - and insert into the RKT. Don't be afraid to press from the top. The top will be going into the rabbit's mouth anyway.


Next pick out some nice  marshmallows for bunny faces. I'm making 6. I may eat them all.


Next with a clean pair of scissors, cut some other marshmallows, sideways. You should get about four pieces out of each one. They look like bunny ears!


They're all done and all different. Just match up a pair for your bunny's face.


Flip your wax paper around and work on your faces.
Pick out some pink hearts for bunny noses.


Dab a little white chocolate on the center to place the pink heart noses.


To make the eyes and whiskers you can use an edible marker like this. Or you can melt some black chocolate and use a toothpick. Or whatever other creative way you can think of to make them. Go for it.


You can make whatever faces you want.
All different, or all just happy to have a carrot, like this.


Time to feed the bunnies! Dip your carrot stick just a little into the white chocolate so you can easily poke through the marshmallow.


Press into the marshmallow just under the nose.


Now they all have their mouths full. YAY!


For their ears use more white chocolate to put on top of their heads and stick the ears on. Do it closer to the top so that the ears slant down and hold in place while they dry.


To make the carrot stems, just use some Wilton's icing!
It comes with that cool star tip and is ready to go. 


Pipe on  the top of the pretzel with a little pressure so it secures on the top and makes a nice leafy dollop. 


They are totally done. Totally yum. I had one as soon as I was done taking pictures. :P And that sun. Boy the sun liked what I was creating. Kept piercing through!


Yes. They are cute. And the kids will laugh that they're eating a bunny that's eating a carrot. Unless they're like my kid, who asked if the bunny was smoking. WHA??? Yes hun. Where have you ever seen an orange cigarette with green smoke?? lol. Whatever you see when you look at these, just shut up and eat them. HA!

7 days of spring break snacks finishes tomorrow!

Thursday, April 2, 2015

I love oreo! POPS!

My love for Oreos is, well, gluttonous. I don't buy them. Only when I am making something special. Keeping Oreos in my house is like keeping that 10 pounds you want to lose but never can or will. Look. I am no DIETER. Dieting is a bad word. But, I do believe in everything in moderation. So yes, I have Oreos in the house this week to make some adorable Easter treats for friends and family. And of course to make these cute Oreo pops. And to eat them. My favorite way to Oreo is not dipping in milk, but dipping in CHOCOLATE.
MMMMMMM.


Ok so you're probably like wowwwoahhh look at all that stuff they're wearing. hahaha.
I made it all with my Bakerella mold from AC Moore. See.


I melted all the Make n Mold candy melt colors I wanted to use, poured into baggies and snipped a small hole to easily fill these molds.  Now. If you don't happen to have these molds, get them. But really, if you don't you can easily draw the decorations you want for your Oreo pops onto wax paper using these filled baggies. Have fun with it. Make sure to pop in the freezer to dry before removing from the wax paper.


It's so much easier to fill using the baggies. See how nice. No over filling or spilling. Just right. So I made a pair of glasses (purple) and a large bow (blue) for the the bunny. I made the petals (the 4 purple ovals) using this mold, and I needed about 9. Such an odd number but yea. Just keep making as many as you need. I also later filled that same mold to make the white bunny ears. Then I made a large bow (pink) for the duck and also a medium bow (orange) to use for the ducks bill. Put in the freezer to dry between molding for faster results.


To start, as with the minis we made the other day, separate your Oreos to put the sticks on. Dip your sticks in melted chocolate and place on top of the cream, pressing into the cream.


Then cover back up to let the Oreos become one again. LOL.
Let them lay there a few minutes to dry.


Dip your Oreo on a stick into some melted white chocolate.
Tap off the excess and place in stand to dry.


While waiting for it to dry, and after you have filled your petal mold with some white chocolate and froze it and popped out these ears, got all that.. fill in the ears with some pink melted chocolate using a toothpick. Let dry.


Dip your white pop again to get another smooth coat of white on it.
See looks so much better double dipped.


Time to play dress up! Using a small pink heart for a nose, glasses are ready to go....


Finish up with putting the ears and bow on using melted white chocolate and use some melted black chocolate to dab two little eyes on with a toothpick. So. Cute. Period.


Next we will work on the flower. I used a mini Oreo for the center, just one half of it. You know all those annoying little halves you have sitting in the bag. This is great for those.


Just dip one side of the Oreo in the melted yellow chocolate like this.


Then cover with yellow nonpariels. If you don't have them, no biggie. Just leave plain yellow. We're good with that.


No matter what you do to decorate, lay it on the wax paper to dry.


Dip an Oreo pop into some melted purple chocolate and let dry. You only need one coat for this since you will be covering in petals. Pipe some purple from your baggie and glue your yellow mini Oreo to the center of  the flower. Then pipe some more around it to start placing the petals on the pop.


Once you are done, YAY. Should look like this. Let your Oreo lay there to dry.


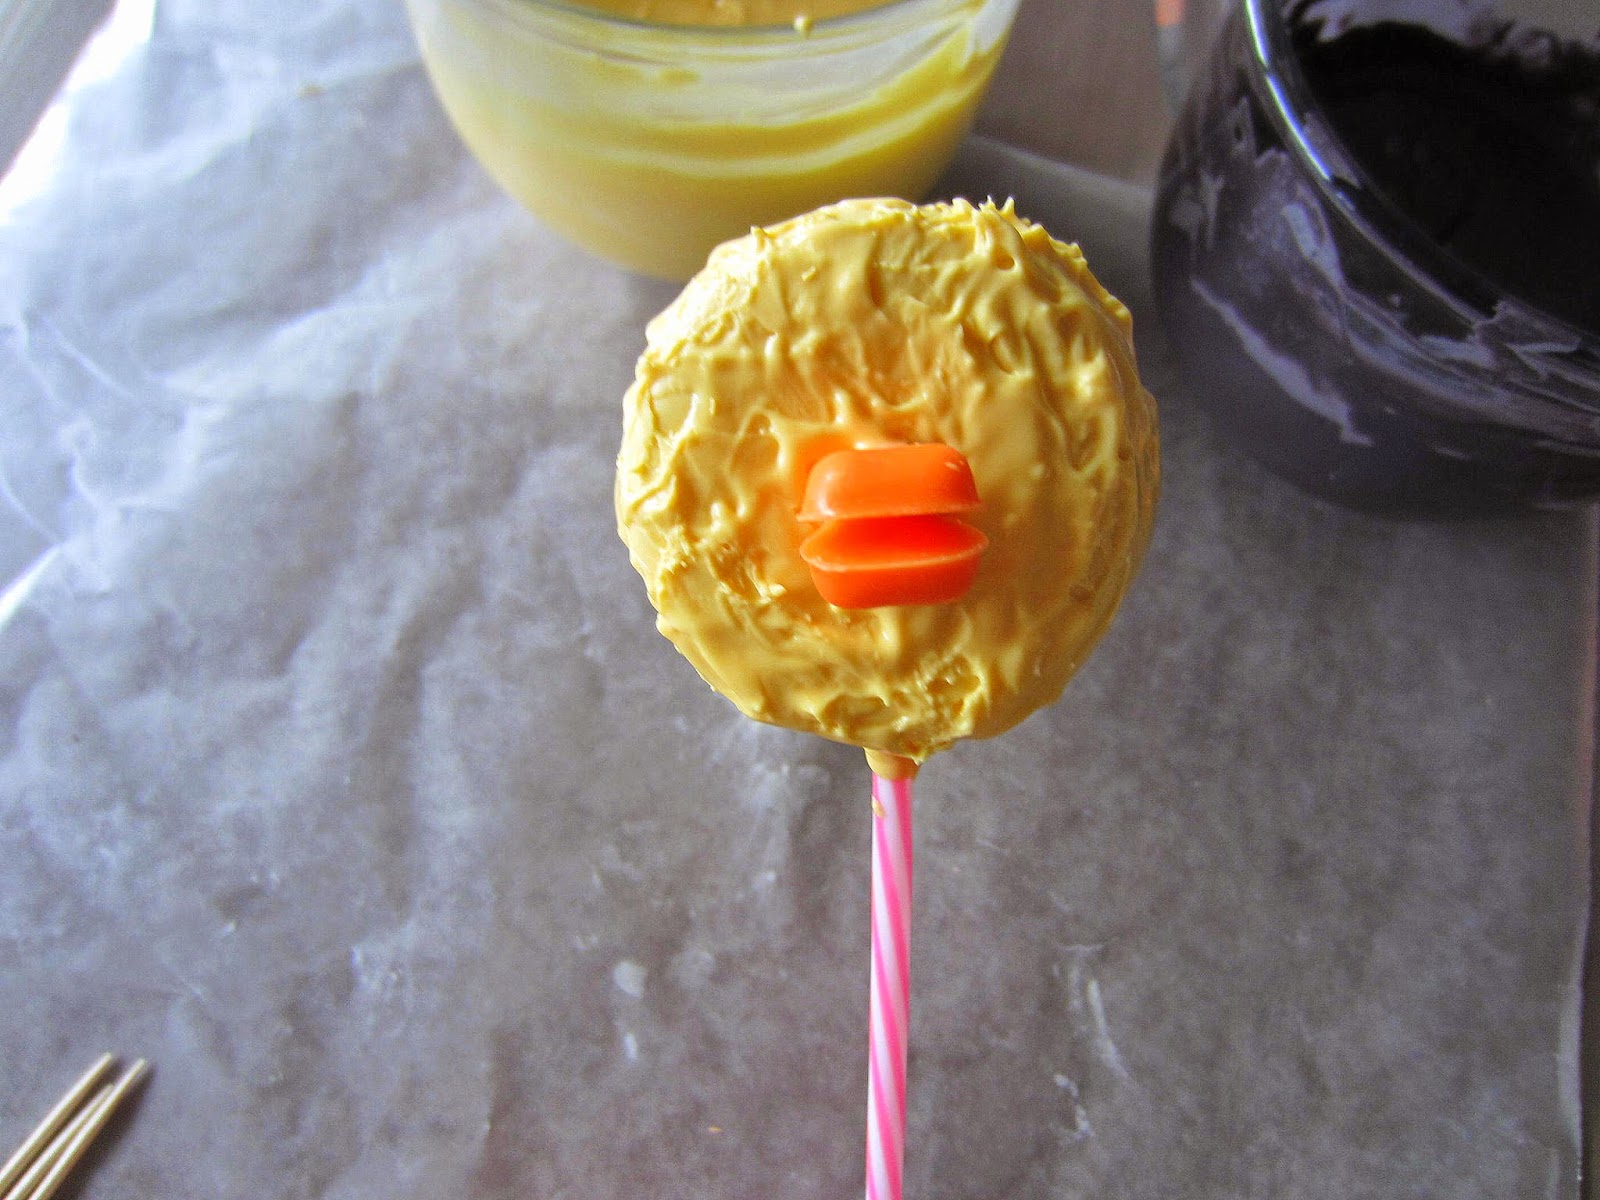
Get ready to make your final Oreo pop, the duck face. HA. I took the orange bow and cut it in half very carefully with a sharp knife to make the duck bill.


Dip this Oreo into melted yellow chocolate and place in the stand to dry.


Let her lay down for this. Take a toothpick and dab some yellow on her face and place the bills on like this. Hold it there just a couple second to let dry.


For a fluffy feathered look use a toothpick to dab some
melted yellow chocolate all over her face.


AW. She's ready to finish up her look.


 Stick her bow in her hair using the yellow chocolate. So cute. Using some melted black chocolate and a toothpick make some pretty little eyes like this.With the white chocolate I also put a little dab in her eyes with a toothpick. She needed a little twinkle. ;D


All done and purty... but not for long.


It's cookies and milk time! YUMMM!
Yea, I could take them allll.

Happy spring break snacking on these cuties!